Needless to say, I was filled with excitement in the anticipation of my bees arrival May 9th. Fortunately, this excitement managed to last until two weeks later, when my bees actually arrived.
I received a call around 7:30AM from the Owings Mills post office. The woman on the other end, with a bit of forced cheerfulness in her voice, said, "Your bees have arrived. We open at 9:00." I arrived shortly after the doors opened and proudly stated that I was there to pick-up my bees. The woman behind the counter disappeared to the back for a few minutes before returning. Just behind her was a man holding the package of bees well away from his body. I guess not everyone is so happy to see our little honey helpers in the morning.
 |
| The bees in the screened package. |
 | | | |
| |
|
|
|
|
|
|
|
|
|
|
|
|
|
|
|
|
|
|
| Welcome to Maryland, bees! |
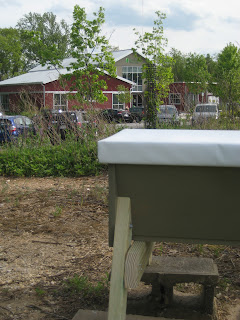
I put the swarm in my car and headed off to Irvine to introduce them to their new home.
Prior to their arrival, I made sure the hive was nice and level. This is an important step as the bees will draw their comb as gravity directs them. A level hive will hopefully mean nice straight combs that are easy to work with and make the best use of the hive's space.
 |
| There are quite a few orioles at Irvine. This one sang beautifully while I used some scrap wood to level the hive. |
 |
| Close enough | | | | | | | | | | |
|
|
|
|
|
Another quick step was to build a feeder to feed the new colony sugar
syrup. They had been in transit for the past few days and it's
important that they have some fresh carbohydrates to build the honeycomb
with. Sugar syrup (1lb sugar/ 1 pint water) is not the best dietary
supplement for the bees, but does the trick to get them started.
 |
| Just a few corks pressed into drilled holes spaced to hold a mason jar. |
|
 |
| Just a few small holes in the lid. |
 |
| Vacuum sealed and ready for the bees to get a drink! |
Once the feeder was in the hive it was time to welcome home the queen. The package has a can full of sugar water sealing it shut. First, I mist the bees with a bit of sugar water to keep them occupied. After loosening the can and lifting it straight up, I have access to the "mini-package" the queen comes in.
 |
| The queen and a few loyal subjects that take care of her during the journey. |
 |
| The queen box attached to one of the top bars. The bees will probably begin by building comb on this bar. |
The queen box is sealed with sugar to keep her enclosed for a couple days while the other bees get accustomed to the new home. The other bees eat away at the sugar to free her. During the shipping, a small cork keeps them from being able to do this. I removed the cork before attaching the box to a top bar with a push pin.
Now, it's time to dump in the rest! After firmly tapping the package against the ground to loosen all the bees, I spray them again with sugar water. Then, I fully remove the can and literally turn the package over and pour the bees into hive. Of course, this also means hundreds of bees flying around in the air too! All there is left to do is close off the hive by putting the top bars in place and put on the lid.
 |
| Releasing thousands of honeybees upon the world! |
 |
| All finished by 10:00AM. |
 |
| Happy to bee home. |


