Showing posts with label naturalist. Show all posts

Thursday, May 3, 2012

Finishing Touches

Before I painted the hive, I measured out some handy legs to attach.  For some odd reason, I didn't take any photos of the legs as I worked on them.  They are pretty simple and cut so that they support the hive by the bottom while attaching to the front and back with 2.5" galvanized bolts.
It has legs!  I made them short so I can put the hive on cinder blocks and keep all the wood off the ground.

The top bars in the hive.
 Here you can see the top bars on top of the hive here without the lid.  I do not have the woodworking expertise to make these beautiful triangle top bars that are a single piece of wood.  There are a lot of ways to make top bars, but ones like this can support a lot of honeycomb and give a large surface for the bees to build on.  My uncle Tommy, an excellent woodworker, made them out of a walnut tree from where I grew up.
Top bar


1/2" hardware cloth on the entrance holes and 1/8" on the floor
Once the legs were attached, the only thing left to do was put some hardware cloth on the bottom and on the entrance and vent holes.  The hardware cloth on the bottom is small so the bees cannot get through and is to allow ventilation.  On the entrance holes, it is 1/2" so the bees can go in and out, but mice cannot raid the hive or nest in it.


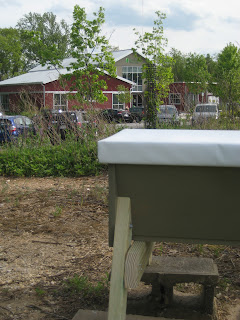
Finally, I was able to move the hive up to its final resting place!


Thursday, April 12, 2012

Materials

While a top bar hive could be made out of pretty much anything, I want to be sure mine will last for a while and gives the bees an optimal working environment. I flattened out my hive plans,

searched for appropriately sized lumber, and put together a materials list.

(3) 1"X12"X6' #2 Pine boards
Galvanized (or brass) wood screws - I chose 2 1/2"
(8) 2" galvanized hex bolts, nuts, and washers

Total price = $50.22

I thought this would be enough wood for both the hive body and the lid, but that turned out not to work. More on that later.

After marking up the wood, I was ready to begin cutting.
I've never really done much woodworking and quickly found that some of my cuts and measurements were not quite right. Fortunately, the critical angles, widths, and lengths were on par.

There are very few important measurements when building a top bar hive. Since, in my case, I wanted to be based on the golden mean, I wanted to be sure that the sides of the hive would meet the bottom at a 120 degree angle. This meant the follower boards had to be the correct dimensions. Follower boards are meant to fit exactly into the hive, hugged by both sides and the bottom and suspended by a top bar. Honeybees tend to fill in any cracks they don't want in the hive, and if the follower boards are not snug, the bees may build propolis around the air spaces which would result in quite a bit of scraping just to get the boards out.

The purpose of the follower board is to limit the size of the hive and keep the bees in the part of the hive you want them. As the colony grows, moving the boards outward allows you to make a bigger space for your bees. Too much space too soon could prove stressful and limit the bees ability to climate control the hive.

Fortunately, I was patient when cutting and piecing together the follower boards and they came together just right. Once they were together, I could set the sides along the angles and trace the front and back boards of the hive to know where I would need to drill holes and insert screws. Again, these are important measurements so the internal dimensions of the hive will be the same front to back. Now I was ready to build!

The front and back screwed into the sides:

The bottom board also screwed into the front and back boards (at this point I realize I'm making a manger):


You can see the follower boards inside the hive in this picture. Eventually, the bottom board will have a rectangle cut into the bottom with hardware cloth covering the opening. This will allow for ventilation in the hive. Since it needs to be cut out with a jigsaw, I was able to attach the bottom before worrying about the hole.

Unfortunately, I did screw up my measurements and cuts for the roof/lid. I'm glad I did though because I think my original lid would have been too fancy and heavy and I decided to pare it down. I'll have more on that once it is finished.

Monday, April 2, 2012

The Bee-ginning

Back in 2007, I took an apiology class with Dr. Dewey Caron at the University of Delaware. I thoroughly enjoyed the course, managed an A, and could not wait to get a hive of my own. Unfortunately, I had 2 years left to my degree, little money to start an apiary, and nowhere to put the bees.

Now, I am a naturalist at a local non-profit nature center. I plan on staying in the area for a while as my wife, Catie, and I like life here so far. It seems I have the time for beekeeping all of a sudden after years of moving from one seasonal job to the next.

The nature center already has several hives of bees and even produces a modest amount of honey for sale. It sits on 116-acres of former pasture land and secondary growth forest. It would be easy to keep a hive here without disturbing the public or the bees. I have the space.

Then I discovered a low maintenance, inexpensive hive called the top bar. These hives are used in many countries around the world but have been forgotten in the U.S. for centuries due to the success of the Langstroth hive. They have been resurrected by amateur beekeepers for the ability to make and manage them cheaply, the idea that they are a more "natural" way to keep bees, and that they are rather attractive in a back yard (when made well). I have the money!

And so begins my adventure in beekeeping and managing a top bar hive colony.