Thursday, July 4, 2013

The Surprise Package

Draper's Super Bee Apiary was wonderful to order from. Their website is very detailed and approachable, easy to use, and left little question that you would get what you wanted. In fact, I got more than I asked for for my $131.

My bees arrived on June 5th. I got the call from the post office, slightly more confident than last year, and again was able to swing by before work. The same woman who helped me last year was there again, but this time she went to get the bees herself and wheeled them out on a cart. To my surprise, what she wheeled out was not one 3lb package of bees, but two!

I had some time once I got to the nature center to prep some bee things. First, I "painted" the screens of the packages with sugar water to give the new colonies some fresh food. Once they were in a shaded, secure location, I was able to get out the honeycomb from the old hive and thaw it. I wouldn't be installing the packages until later in the day to ensure they would get accustomed to their new home.

6-lbs of bees and some combs.

So, what to do with the extra package? Wally had a new and empty top bar hive with honey stores added to it in the apiary. I figured that would be the best place to put them since each package had a queen.

My hive (right) and Wally's (left) and the packages.

Our apiary seemed like it was going to go from pitiful to productive with this bonus package. Then, I took out the queen cage from the first one. Of course, she was dead.

The dead queen.
Maybe this is why two packages were sent to me instead of one? Was a subpar queen known to be included in one of them?

Unfortunately, I now had to decide quickly what to do with all these bees. I installed the second package into my hive (the queen looked great) and stopped to think for a minute. I could call Draper's and let them know about the dead queen, but since the package was a bonus, I would feel bad having them send me a replacement for a queen I had never ordered. I also didn't want to keep the bees packaged up any longer.

My bees finding their way into the hive . . . but getting confused by the other package.
Finally, I knew what I was going to do.  I didn't want to simply dump the second package into the hive since they may kill the unfamiliar queen inside. Queen-less bees, however, may "drift" to a hive that has one. So, I dumped the second package of bees directly onto the ground and counted on them to find their way into the hive body.

The next morning, all the bees had moved into the hive and there were many flying in and out of the entrance. It looked as though they had all gotten along well enough to become one (huge) starter colony. As you saw previously, the plethora of bees allowed for quick comb build up and plenty of foraging.
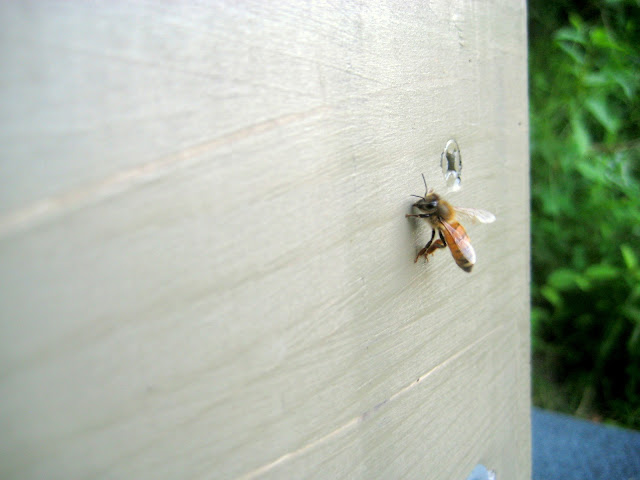
A bee waving pheromones in the air to call others to the hive.

Monday, July 1, 2013

A Late Spring Swarm

Having no bees to start the season with, I was faced with an important decision: do I wait for a swarm or drop about $100 on a package of bees?

The winter was unkind to many beekeepers, likely meaning swarms could be difficult to come by. I eventually broke down and ordered a package of Italian bees with a clipped/marked queen. I learned a lot last year and hoped that the extra money for bees from a reputable company would be worth the price.  I would not be disappointed!

About a week before my bees arrived, the observation hive at work decided to swarm.  Not only this, but strong winds forced them to land about 2 feet off the ground on the branch of a shrub, ripe for capture.
A very large swarm. (photo by Leslie)
Technically, they were still the nature center's bees, so I would not have wanted to take them for my hive. Not to mention these bees from Russian decent have generally been annoyingly aggressive. Unfortunately, they were not captured effectively for another hive and soon flew off through the forest.

It was pretty interesting to follow the swarm through the trees.  You could see the cloud of insects moving, but listening for the buzz was the best way to trace them. Their final resting place for the evening was about 60 feet off the ground in a tuliptree.


Sunday, June 30, 2013

Time for Something Sweet

It is worth noting that the honeybee is not native to North America. While there are numerous native bees that are ultimately more important to us, none of them are honey producers and none produce as many other bee products as the European honeybee. Sugarcane, another natural sugar source, didn't even arrive in South America until the 1540s. I won't even get into corn syrup.

So what was a poor Native American to do without these major sources of sweeteners? Tap maple trees, of course!

Taking a lesson from before colonization of the New World, I decided to make some of my own maple syrup this winter. My bees were dead and left me little honey, but this winter in Maryland caused great sap flow and I ended up bringing home 5-gallons of red maple sap to boil down to sugar.  That's really all you need to do!  Strain out the bugs and boil it down.


5-gallons of sap . . .

. . . boiled down . . .

. . . to two of these containers.
The syrup was quite good and I used it for pancakes, priming beer bottles, and as a sweetener in my coffee. The most important thing I learned is this is not a project for an apartment unless you want to turn it into a sauna for the day. Most folks start the process outside over a fire.

Sunday, June 23, 2013

Rather than build suspense . . .

My package bees arrived from Drapers Super Bee Apiaries (now they really are super bees!) just over two weeks ago on June 6th. There are quite a few things to report on between my last post and the current state of the bees, but I just want to show you a successful two week hive!

The bees released their queen from the queen cage and she had already laid eggs in most of the newly made comb by the end of the first week. I fed the bees a pint of simple syrup and went off to Minnesota for a fun wedding. Yesterday, I went back in to feed the bees again and was delighted in what I saw!

The bees had comb built all the way to the feeder! In all, 10 top bars had comb, most built almost completely across.

Most of the combs looked like this one (except slightly larger) with bee bread (pollen), honey, and plenty of brood. Zoom in and you can see the 'c' shaped larvae.
I was especially pleased that the bees had not yet built any brace comb, making my initial inspection of the hive quick and smooth. I did see the queen looking healthy and active. For the first time in over a year, beekeeping is more fun than challenging!

Sunday, January 13, 2013

A New Year

The holidays brought with them a White Christmas and cold weather.  This was the first real test for my bees.  It was also the last test.

I wasn't really concerned about the cluster size when fall ended, but many of the bees in that original cluster had died of old age come December.  The cluster is the group of bees that stays together in the part of the hive that is easiest to keep warm but is still well ventilated.  In the early spring months, the cluster surrounds the brood, keeping it at a near constant temperature around 94-95 degrees F.  In the winter, it protects the queen from freezing temperatures.  All bees in a hive become part of the cluster over winter.

Unfortunately, with too few bees, the core of the cluster dropped below the minimum survivable colony temperature of 55 degrees.  This week has been rather balmy, so I checked out the hive to find no survivors.  I was hoping to be able to preserve the queen for education purposes at the nature center, but alas, a mouse made made it in first!

Mouse damage to the comb
You can see that there are some bees with their heads in the comb.  This is usually a sign of starvation, but these bees still had some capped honey (albeit not much).


The bad news is, my bees did not make it through the winter.  There is a lot of good news though!  I was able to salvage comb and honey to get a new hive started in the spring, I have a lot less to worry about over the winter, and most of all, I have learned a lot from my first year keeping bees.  I am excited to get started again soon.

Monday, December 17, 2012

Oh, it's almost winter already?

So, I've neglected to update.  A big part of this is a lack of interesting photos.  A big part of that is being so focused on simply trying to keep my bees alive (and not getting stung) that I forget my camera.

Winter is upon us in just a few days and my bees are safely nestled in their wooden box.  They managed to store some honey and cap it, but not nearly the 40 lbs a healthy hive would need to survive the winter.  That's a lot of honey!

Once fall arrived, I realized that my bees situation was desperate and if they were to make it to spring, they'd need some help.  I guess that's why they call us beekeepers and not beewatchers.  I made sure to continue supplying the bees with sugar water from my feeder, but this truly is bee junk food.  Not to mention, my ant problems returned thanks to the sugar, albeit in the form of tiny ants this time.

Watching the bees fend off the miniature, by comparison, ants is fascinating.  The ants are too small for the bees to attack.  Instead, they "herd" the ants away, flapping their wings and vibrating furiously.  Undoubtedly some ants evade this technique, but it keeps them from overwhelming the bees' access to the sweet sugar water.  The ants were incredibly numerous, though, and enough of a problem that I scattered diatomaceous earth (DM) around the legs of the hive and along the trail of ants through the grass.  There is a lot of controversy surround DM and its safety for use around hives, but I've noticed no ill effect on the bees as it is not a chemical and must be transferred to the inside of the hive to be harmful.  I'm sure the ants caused some traces to enter the hive, but not nearly enough to cause as much a problem the ants were.


Monday, August 27, 2012

A New Beeginning

The season for catching swarms is long gone come the first week of July.  This means a complete rethinking of how to get a new hive started this summer.  Again, it is honeybee biology and social structure to the rescue!

The traditional way to turn one beehive into two beehives is to split the hive.  This involves taking a robust hive and removing frames of bees.  Frames are the structures inside the traditional boxy Langstroth hives most people associate with beekeeping.  Fortunately for me, there is a healthy observation colony at Irvine that regularly needs frames removed from it to give the queen room to lay eggs and prevent the hive from becoming overcrowded.

To get the worker bees to raise a new queen, two frames with bees are removed from this hive (there are only four frames in it total) and are replaced with empty frames.  The frames removed will ideally have capped brood (pupa ready to emerge as adults), larva at various stages, eggs, and some capped honey for sustaining the larva.  They are placed in a small, half hive called a nuc, short for nucleus.  A frame of honey from another hive and two empty frames are placed in the nuc box.  The bees will use several of the eggs available to them to rear a new queen in this box.  All the frames with the new queen and all the bees are later transferred to a new hive body.  The whole process takes close to a month.

There are a few problems, though.  The nuc box is made for 19-inch frames.  I have top bars that are 17 3/4-inches long.  The frames in the nuc normally have cells on them already so the bees don't need to waste energy and resources building wax.  Top bars require the bees to build fresh comb.

The solution to the second problem was simple.  Since my first hive failed, I had new comb already drawn on three top bars. 


To solve the first problem, I simply jury-rigged an extension onto the back wall of the nuc box allowing two of my comb covered top bars to hang from it.
I originally screwed this board to three of the top bars.  I would later not worry about the screws because the bees would seal the bars in place with propolis.  I also kept it to two bars because the comb broke off of one when I dropped it.
How it will look in the nuc box.

The next time the observation hive needed frames removed, we put them into the nuc with my top bars.  Within two weeks, a new queen was walking around in the hive!  less than two weeks later, I opened the box to see her inspecting my comb for egg laying purposes.  I quickly moved the two bars into my hive body and shook the bees off one of the frames and into my hive.  I watched for a bit as the confused bees flew through the air.  Fortunately, they were picking up the strong scent from the bees and queen in my hive and many of the bees flew in to join them.  Some strayed back to the nuc, however.

The next day, I fed the new colony some 2:1 sugar:water syrup and it was time to wait and hope they would stay in there for the long haul!